How to Access Playback on Gamut NVR/DVR/ Camera Using Surveillance ClientUpdated 10 months ago
Purpose of The Guide
This guide will show you how to access playback recordings of your Gamut camera or recorder, using a Windows or Mac computer.
Before You Begin
Your Gamut device will need to be turned on and connected to your internet router. You will need to use a TV to set up the recorder for the first time, follow the quick start guide to do so. After the initial setup, a TV or monitor is not necessary when accessing the recorder via a network connection.
If you are using a recorder and cameras, make sure that the cameras are connected and working.
If you are using a Wi-Fi bridge system with your camera, make sure that the bridges are turned on, wired correctly and communicating before you begin.
Let’s Get Started
Now that you have connected your recorder/camera to your internet router and turned it on, you will be able to view it using a program called Surveillance Client.
You will need to get the device added first to the Surveillance Client, if you have done this, then follow the guide below, if not then you will need to follow this guide Here
To access recordings, go to the Control Panel and then click on Remote Playback. Open up your group on the left side panel, then select the cameras which you would like to view recordings from and then just below the camera you can choose what type of playback you are looking for, depending on how you have setup the camera/recorder. You can select the date using the calendar on the bottom left which should show a red mark on each date that has any footage.
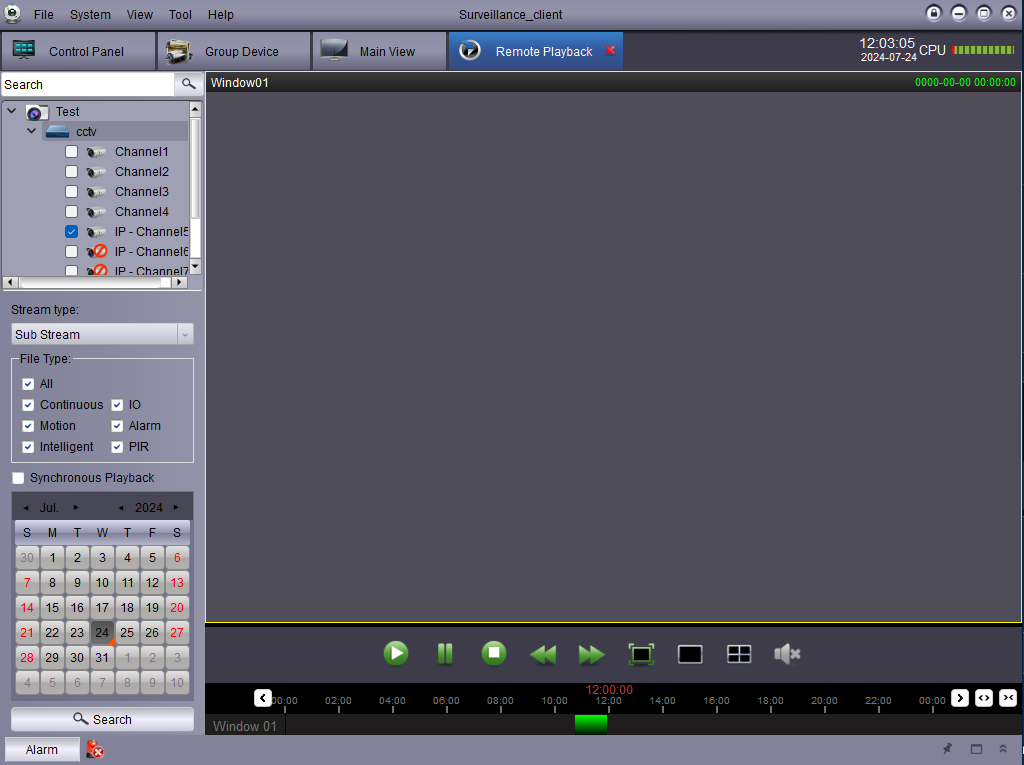
Once you have pressed play, you will see a timeline at the bottom, if you have your recorder set to motion it will be yellow, on continuous recording it will show a green line across the timeline, you can select what time to play by clicking on the timeline and then pressing play.
For more information on the settings of the recorder, please refer to the quick start guide or the manual.
Need more help?
If you need help with anything else please check out our other guides or get in contact.