How to install or replace the hard drive in a Gamut recorderUpdated 3 months ago
Purpose of the guide
This guide will show you how to install or replace the hard drive in a recorder.
Before you begin
Check the box which your recorder or hard drive came in, there should be a pack of four screws inside which will allow you to attach the hard drive to the recorder.
You should also check whether the hard drive is suitable for your purposes. Standard hard drives used in desktop computers will work with a recorder, but they do not tend to last as long as 'Surveillance Grade' hard drives designed for use in CCTV recorders, because they are not intended to be used 24/7.
Let’s get started
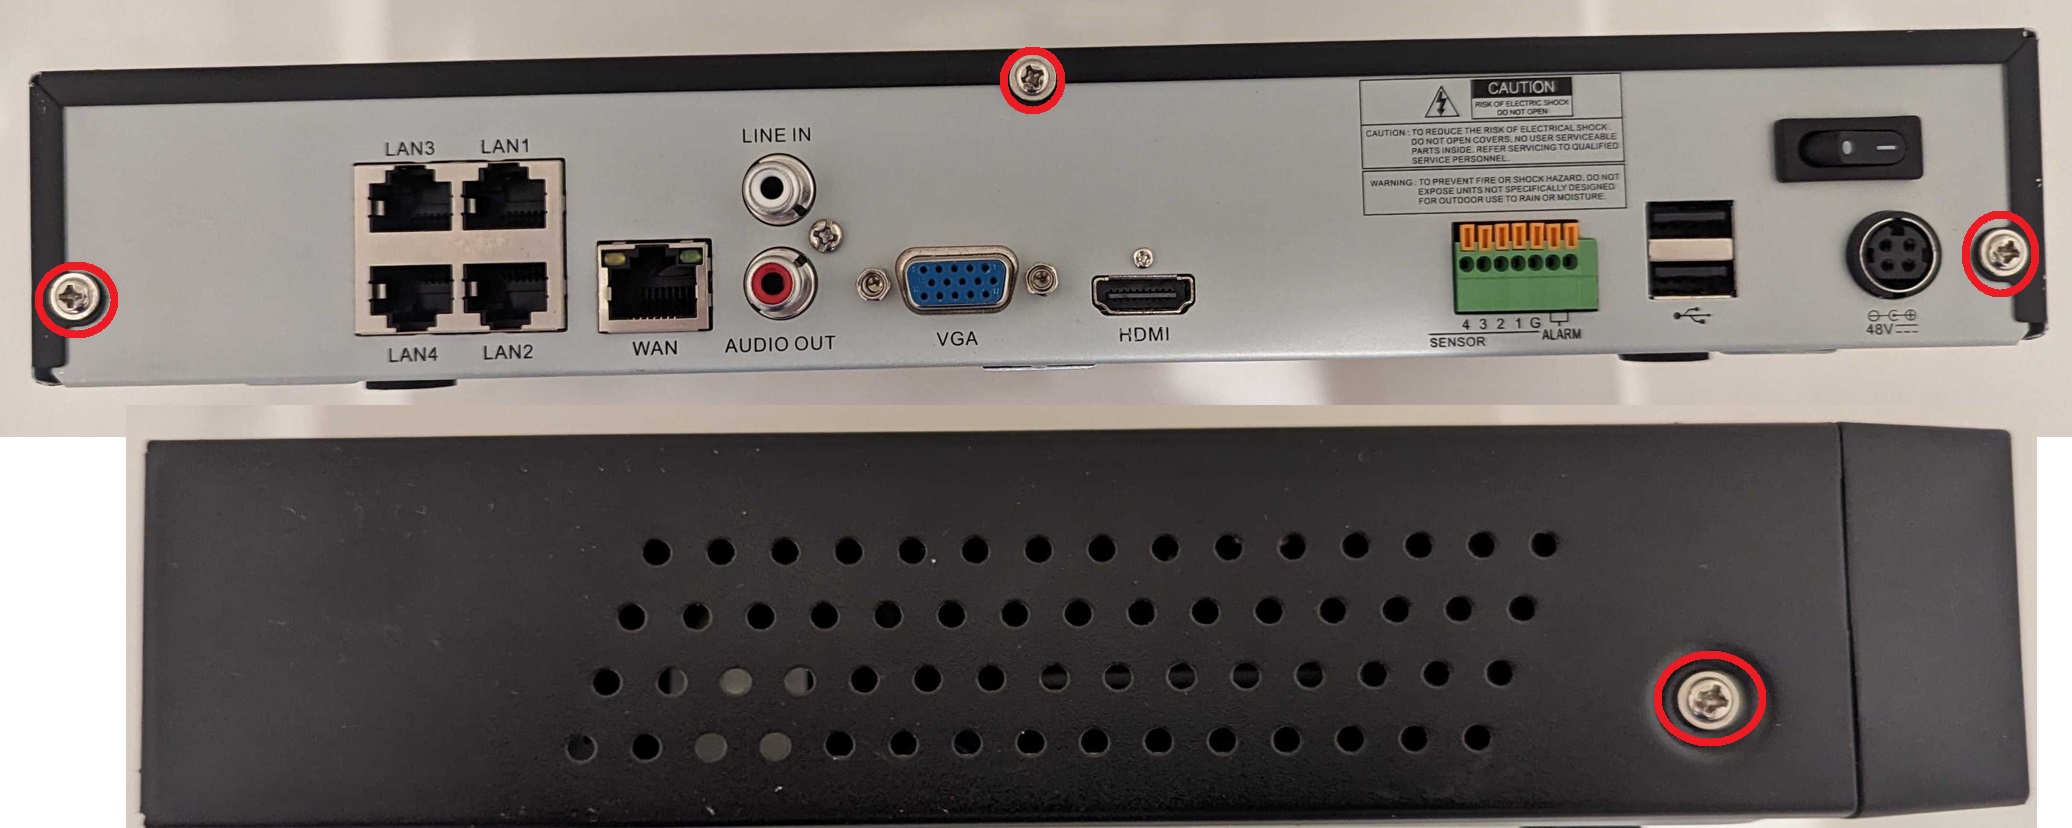
We need to start off by removing the screws that hold the top case onto the unit, there are usually three on the back and one on each side. Depending on the model of recorder there may be more on the sides. See the areas circled in red in the below picture:
Once you have taken the case off the inside should look something like the picture below. The hard drive sits on the areas circled in red, with the screws on the bottom. Make sure to move any cables that will be in the way of the screw holes, and make sure the hard drive won't be sitting on top of any of the cables like the grey one in our example below.

In the above picture, the black/red/yellow and the blue cable are the two that will connect in to your hard drive. They are both different sizes and can only be plugged in one way due to the way they are designed.
Below is a picture of the hard drive connectors, as you can see they are both different sizes, again this means the cables will only connect one way:
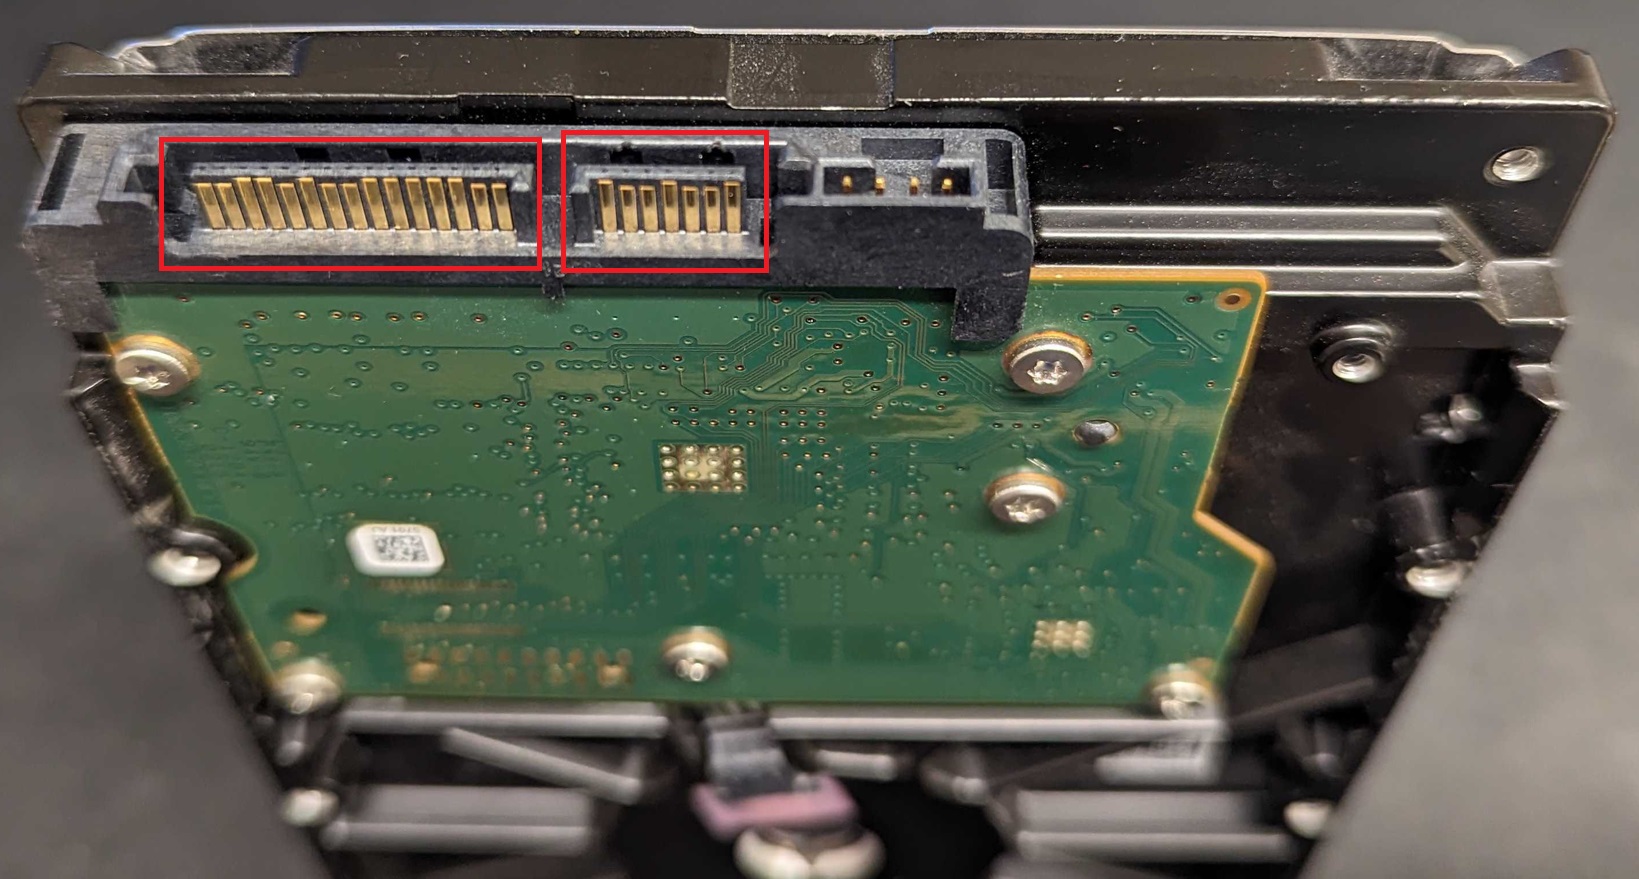
Once all the cables are attached and the hard drive is in place it should look something like this:

If you haven't already done so, the last step will then be to secure the hard dive using the screws we found at the start.
To do this you will need to be looking at the bottom of the unit and line up the screw threads on the drive with the holes on the bottom of the recorder. It may help to screw in each one slightly to make sure the hard drive doesn't move too much, then whilst holding the hard drive still tighten all of the screws in place.
Once done, pop the case back on and fit its screws back in place.
Formatting your HDD
Once the hard drive has been installed and connected there is one more step that needs to be carried out within the menu of the recorder. This is 'formatting' or for Hikvision devices 'Initialising' the hard drive. This essentially prepares the hard drive to be recorded to by that particular device, whilst also completely deleting all the data that was stored on the hard drive.
If you have anything valuable stored on there, back it up first!
Gamut
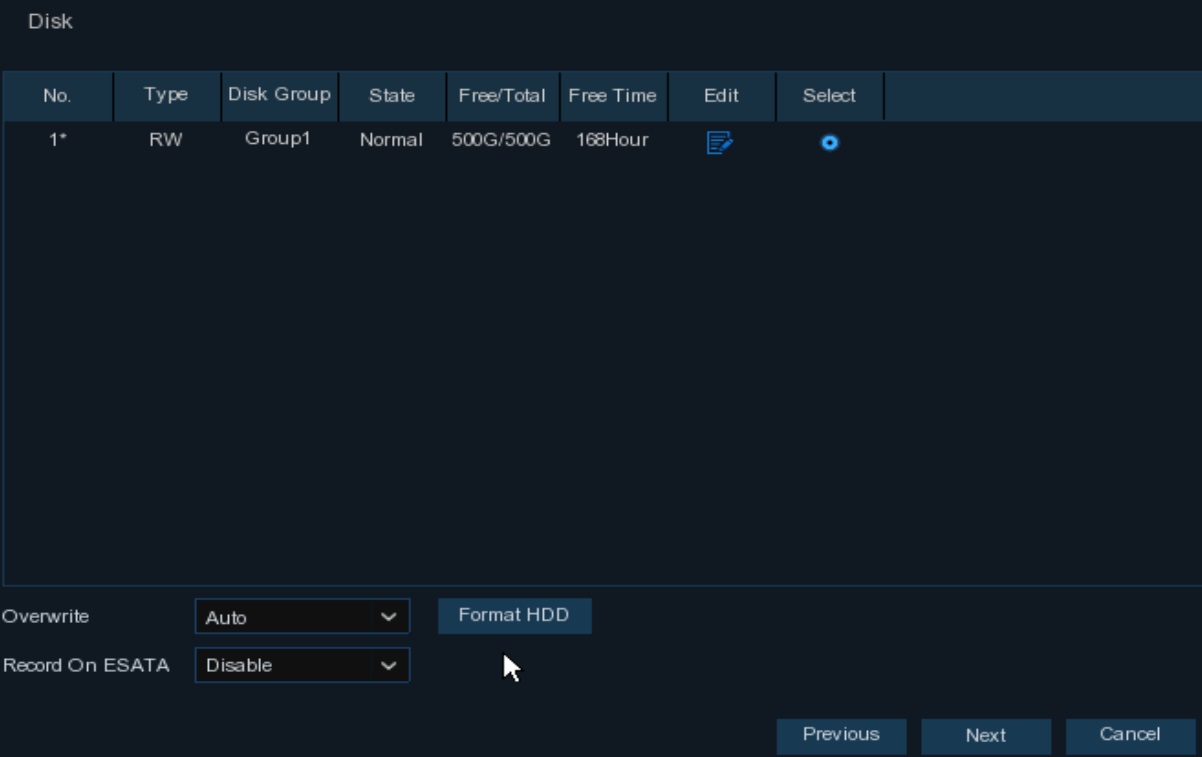
Starting from the main menu, right click your mouse, click on the cog wheel icon at the bottom left, then go to Setup > Device > Disk. Now select the hard drive on the right side of the screen, then click on 'Format HDD' at the bottom of the screen. You will need to enter your password, then it will take thirty seconds or so to format the drive. Once it is complete the status will say 'Normal'.
Hikvision
How do I format/initialise the hard drive in my Hikvision recorder?
Need more help?
If you need help with anything else please check out our other guides or get in contact.