How to disable the audible alarm/beeping noise on a Hikvision recorderUpdated 3 months ago
By default the Hikvision Recorders come with all the audible alarms enabled. This can cause the system to sound buzzers even if everything is recording correctly. The most common reason people get this alarm sound is because they are setting up their recorder for the first time with a hard drive that has not been 'initialised'. This is just another word for formatting, which is the process of wiping off the hard drive and preparing it to be used by a new device. This needs to be done even with brand new hard drives.
Keep reading to find out how to do this, or if your recorder alarm is going off for a different reason then follow the 'Disabling All Alarms' section, depending on whether you are using the recorder with a monitor and mouse, or using Internet Explorer.
Using Internet Explorer
Initialising the Hard Drive
You will be prompted to initialise the hard drive during the initial set up, but let's assume that you are starting from the main live view menu on Internet Explorer.
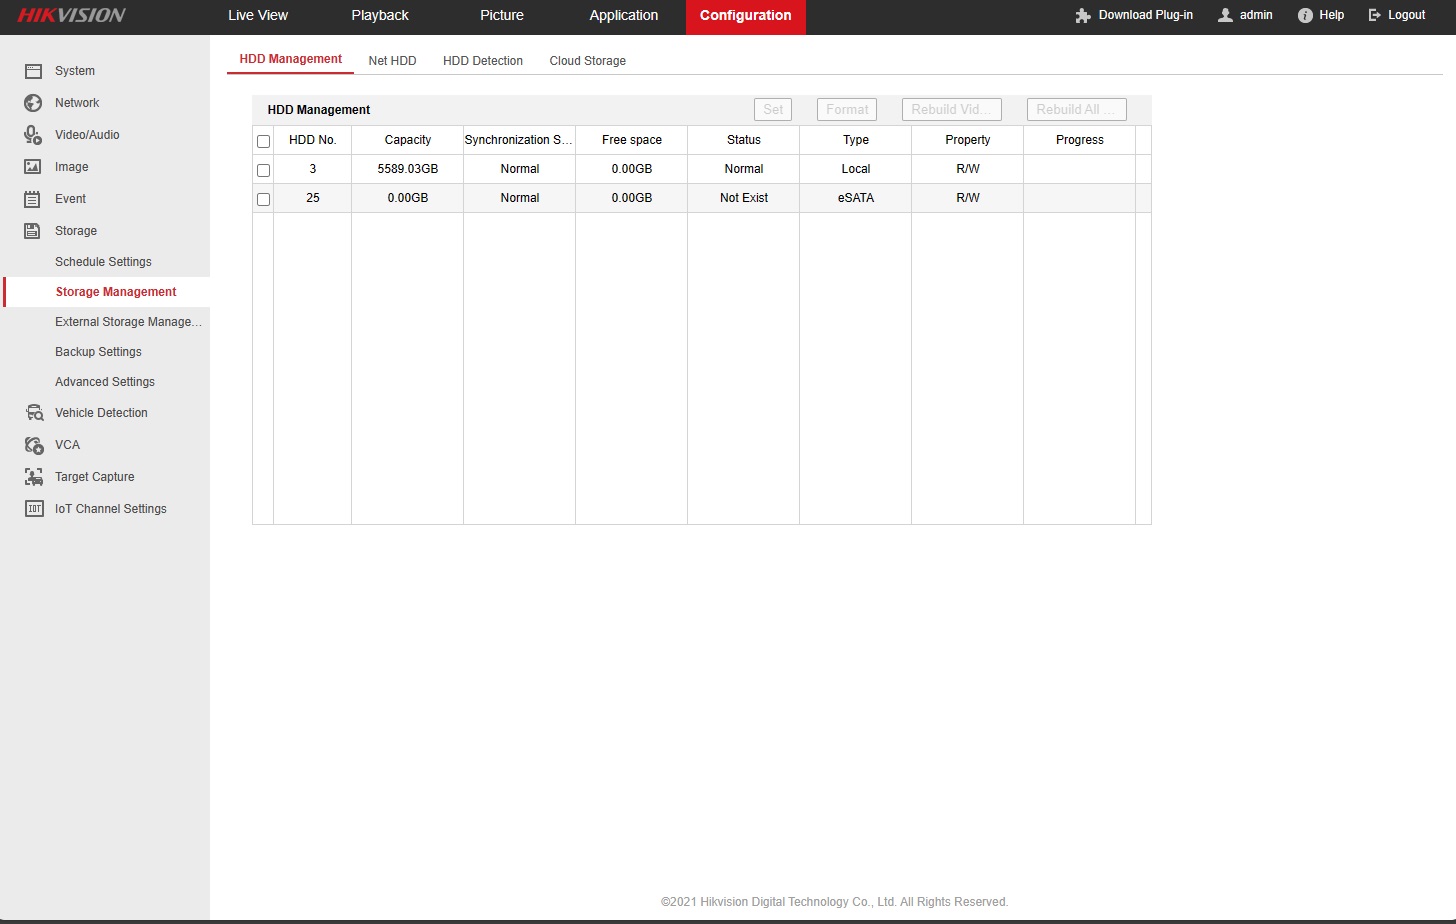
Click on Configuration > Storage > Storage Management.
Tick the box next to the listing of the hard drive (most people only have one), then click 'Format'. If the status of your hard drive is 'Normal' then you shouldn't need to re-format it.
Disabling All Alarms
If your recorder is beeping after the hard drive has been initialised then this may be caused by things like only having 2 cameras connected to a 4 channel recorder or not having a network cable connected. Not everyone uses all the channels on their recorder, and not everyone wants it connected to their network, so we’ll tell you have to turn off the alarms before they drive you crazy.
Go to Configuration > Event > Basic Event > Exception. By selecting different Exception Types from the drop down menu, you can see which types of alarms are enabled for each type of 'event'.
- Audible Warning will cause the recorder to beep if the selected event occurs
- Send Email will cause the recorder to send you an email if the selected event occurs (this must be set up first)
- Notify Surveillance Center will send a notification to Hik Connect or iVMS4500 if the selected event occurs
- Trigger Alarm Output is only used if you have an external alarm system connected to the recorder

To disable these events just un-tick the alarm type and then select 'Save'.
Using the Recorder Menu
Initialising your Hard Drive
You will be prompted to initialise the hard drive during the initial set up, but let's assume that you are starting from the main live view menu. First off, right click on your mouse and log-in if prompted, and then select ‘Menu’.

Then select 'HDD'.

You will be taken to a list that looks similar to this; there should be a hard drive listed, showing the capacity and status of it. You just need to select the box to the left of the hard drive you want to format, then click 'Init' at the bottom right of the page. It might take a few minutes but once the process is complete the hard drive will show a status of 'Normal' and the free space will be the same as the capacity (since all the data has been wiped from the hard drive).

Now, your hard drive is ready to be recorded onto and that irritating alarm will stop! Keep reading to find out how to actually turn off all or some of the alarms.
Disabling All Alarms
If your recorder is beeping after the hard drive has been initialised then this may be caused by things like only having 2 cameras connected to a 4 channel recorder or not having a network cable connected. Not everyone uses all the channels on their recorder, and not everyone wants it connected to their network, so we’ll tell you have to turn off the alarms before they drive you crazy.
The first step is to right click on your mouse and log-in if prompted, and then select ‘Menu’.

The next step is to select ‘Configuration’.

Now on the Configuration screen select ‘Exceptions’ on the left hand list of sections.

Now you need to click on the menu next to ‘Exception Type’ and select ‘All’.

Now ensure the tick box next to ‘Audible Warning’ is unticked and then click the ‘Apply’ button.

This has now disabled all the audible warning on your Hikvision recorder. You might however wish to re-enable some off them, for example ‘HDD Error’, as it would be important to know if your HDD had developed a fault.
To do this, click on the drop down next to ‘Exception Type’ and select ‘HDD Error’.
Tick the box next to ‘Audible Warning’ and then press the ‘Apply’ button.

Now we have re-enabled the HDD Error alarm only. Feel free to go through and re-enable any more you may need although this is the only important one for most people.
Need more help?
If you need help with anything else please check out our other guides or get in contact.